Easy Fun Fold Floral Cards with Trifold & Z-Fold Designs
by Therese Calvird August 19, 2026

Key Takeaways
Simple Techniques, High Impact: Easy fun folds like window trifolds and Z-folds add interactive dimension without complicated measuring or assembly.
Stretch Your Supplies: You can create entirely distinct card layouts using the exact same die-cut, stencil, and ink set.
Mail-Friendly Designs: Both card designs lie flat for easy mailing while maintaining their dynamic multi-panel structure.
Seamless Alignment: Stenciled scenes and die-cut circle windows create natural framing for layered focal points and sentiments.
Want to add a little extra interest to your floral cards without making them complicated? A simple fun fold can do just that.
Today I’m sharing two easy fun fold floral cards, with a window trifold and a Z-fold that add a little extra interest to these soft painterly designs.
Hi there, it's Therese, and I'm back with another edition of Take 2 with Therese!

Why You Should Try Fun Fold Floral Cards
Fun fold floral cards are a simple, high-impact way to elevate your paper crafting without making the card-making process difficult or overly technical.
In these featured handmade cards, I focused on a few core paper crafting techniques that anyone can master:
Creating a circle window trifold to reveal a beautifully stenciled background scene inside.
Making a simple Z-fold card that stays interactive yet folds completely flat for standard mailing.
Overhanging floral die-cuts across panel edges for extra artistic depth and movement.
Building painterly landscape scenes using soft, layered stencil ink blending.
Maximizing your craft supplies by changing card base folds and layouts while keeping the main design elements consistent.
Card #1: How to Make a Floral Trifold Window Card
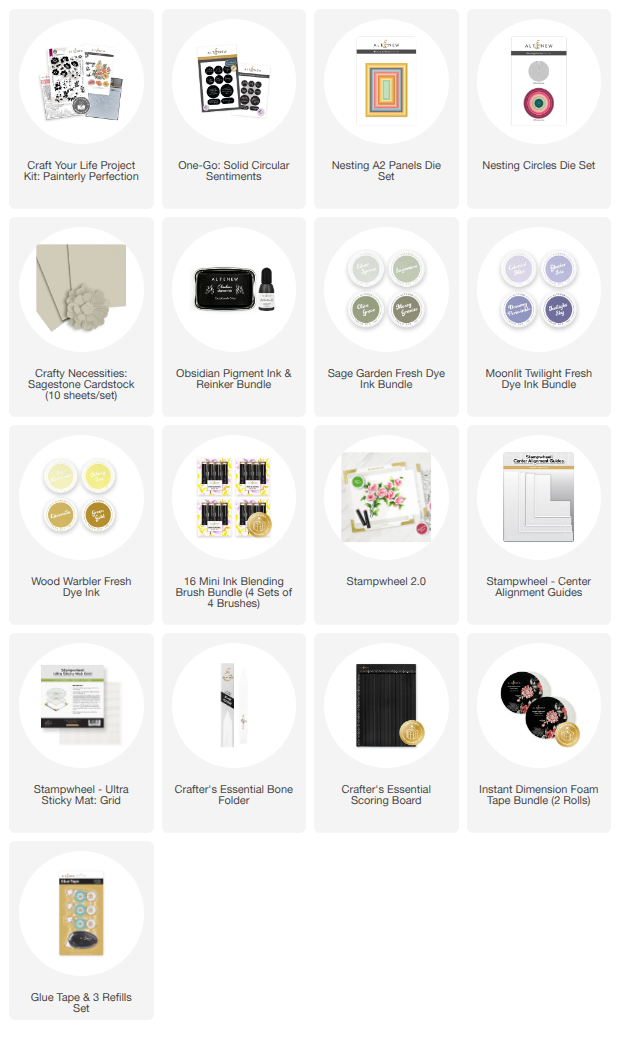
Supplies Needed for the Floral Trifold Card
Step-by-Step Trifold Card Instructions
For my first fun fold floral card, I created a circle window trifold card that lets the soft Craft Your Life: Painterly Perfection stencil scene peek through from the inside panel.
Prep the Window Panel: Start by die-cutting the front panel with a Nesting A2 rectangle and a central Nesting Circle die. Run it through your die-cutting machine with the coordinating 3D embossing folder to add touchable, painterly texture.

Construct the Base: Take two A2 side-fold card bases made from Sagestone Cardstock. On the first base, die cut a slightly smaller circle from the front panel, ensuring it aligns perfectly behind your textured window panel.

Assemble the Trifold: Turn the second A2 card base so that it opens to the left. Adhere the back panels of both card bases together securely using strong liquid glue or double-sided tape.

Incorporate the Scene: On the center panel, stamp and stencil the soft Painterly Perfection scene so it lines up with the window when the card is closed. Pop up the layered floral bouquet along the left edge using foam adhesive, then center your One-Go: Solid Circular Sentiment inside the circular window frame.

Finish the Interior: Adhere a plain white panel die-cut with the Nesting A2 Rectangle die to the innermost panel. This gives you plenty of space to write a personalized message without obscuring your stenciled scene.
Card #2: How to Create a Floral Z-Fold Card
Supplies Needed for the Floral Z-Fold Card
Step-by-Step Z-Fold Card Instructions
For my second design, I built a simple yet elegant Z-fold floral card that offers interactive movement while using the exact same ink palette and stamp set.
Score and Fold the Base: Start with an A2 side-fold card base made from Sagestone Cardstock. Place the front cover on your scoring board, score vertically at 2 1/8", and fold the panel back on itself toward the outer hinge to form the classic Z-fold structure.

Blend the Background Ink: Maintain color harmony across both card projects by using pale greens from the Sage Garden Fresh Dye Ink set paired with deep purples from the Moonlit Twilight set.

Add the Stenciled Layer: Blend the Painterly Perfection stenciled background directly onto the back exposed panel of the card base so it creates a continuous scene

Attach the Focal Elements: Mount the stenciled floral bouquet onto the front folded panel using foam tape, allowing the outer edges of the flowers to overhang the right crease. Complete the layout by layering a small One-Go: Solid Circular Sentiment directly over the floral arrangement.
Watch the Fun Fold Floral Card Video Tutorial
If you'd like to watch these step-by-step instructions for both fun fold card designs in detail, check out the full video tutorial on YouTube!

A simple trifold or Z-fold can add something extra to your floral cards without making them difficult to create.
I hope these two designs inspire you to try a fun fold with the stamps, dies, and stencils you already have in your stash.
Will you be trying either of these fun fold ideas? Let me know in the comments below!

Up to 45% OFF Summer or Early Fall Collection Sale + Get a FREE Sunlit Gold Glitter Tape on orders over $49 within the collection from August 18, 2026 at 12:01 AM EDT until August 20, 2026 at 11:59 PM EDT.
Shop here: https://oltonew.shop/collections/summer-or-early-fall-collection-2026
Add the Sunlit Gold Glitter Tape to your cart to get it for FREE at checkout.
SUPPLY LIST