How to Add Elegance and Dimension to Your Design with Patterned Petals the Clean and Simple Way!
Hello Altenew friends! Hannelie here, and today I am super exited to share three stunning cards I made with the Patterned Petals Builder Stencil Set. I added a touch of elegance and dimension by using some Shimmer Relief Paste to one of the layers.
This set includes four versatile stencils that can be mixed and matched to create endless unique patterns. Use all four for an intricate, layered look, or experiment with just two or three to create a completely different design. These designs also highlight creative ways to preserve white space—perfect for achieving a clean and simple look with maximum impact!

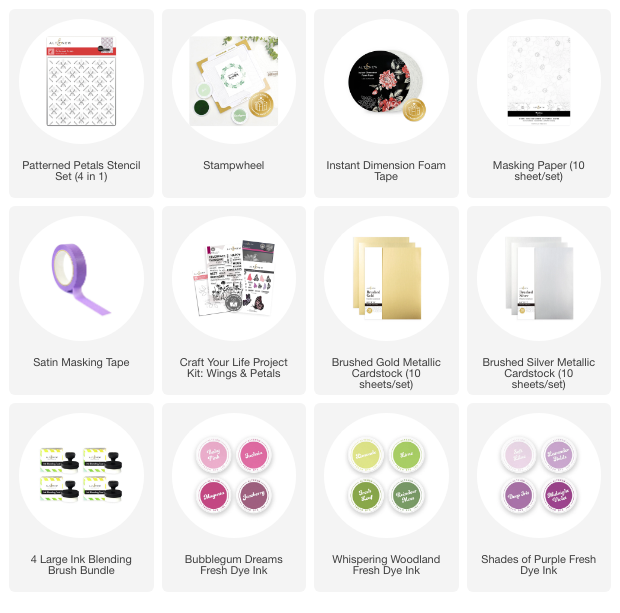
To make today’s cards you will need:
- White card stock.
- Masking Paper or Tape.
- Patterned Petals Builder Stencil Set.
- Bubblegum Dreams Fresh Dye Ink for card #1.
- Shades of Purple Fresh Dye Ink for card #2.
- Whispering Woodland Fresh Dye Ink for card #3.
- Enchanted Gold Shimmer Relief Paste.
- Antique Silver Shimmer Relief Paste.
- Brushed Pyrite Shimmer Relief Paste.
- Wings and Petals Project Kit (sentiments).
- Blending Brushes.
- Stampwheel.
- Brushed Gold and Brushed Silver cardstock.
- Instant Dimension Foam Tape.
- Die cutting machine.
Step-by-Step Instructions to Make the Pink “Celebrate” Patterned Petals Card:

- Trim and fold the white card stock to create an A2 card.
- Secure the card onto the sticky surface of the Stampwheel.
- Position the first stencil to ensure the pattern is perfectly aligned.
- Use masking paper or tape to mask off the pattern (please refer to photo and repeat for each layer)
- Use the first stencil and apply Baby Pink ink.
- Use the second stencil and apply Fuchsia ink.
- Use the third stencil and apply Magenta ink with a blending brush.
- Use the final stencil and apply Enchanted Gold Shimmer Relief Paste.
- Leave the card to dry completely, allowing the shimmer paste to set. This doesn’t take too long!
- Stamp the sentiment using the Stampwheel. I used Fuchsia and Magenta to create a gradient effect.
- Cut the sentiment out using the coordinating die. Die cut an additional layer using Brushed Gold card stock and adhere it to the sentiment to create an offset effect.
- Adhere the sentiment to the card using Instant Dimension Foam Tape for added dimension and interest.

Step-by-Step Instructions to Make the Patterned Petals Birthday Card:

- Trim and fold the white card stock to create an A2 card.
- Secure the card onto the sticky surface of the Stampwheel.
- Position the first stencil to ensure the pattern is perfectly aligned.
- Use masking paper or tape to mask off the pattern (please refer to photo and repeat for each layer except the last layer where no masking was done)
- Use the first stencil and apply Lavender Fields ink.
- Use the second stencil and apply Deep Iris ink.
- Use the third stencil and apply Midnight Violet ink with a blending brush.
- Remove the mask and use the final stencil to apply Antique Silver Relief Paste.
- Leave the card to dry completely, allowing the shimmer paste to set.
- Stamp the sentiment using the Stampwheel. I used Lavender Fields and Midnight Violet to create a gradient effect.
- Cut the sentiment out using the coordinating die. Die cut an additional layer using Brushed Silver card stock and adhere it to the sentiment to create an offset effect.
- Adhere the sentiment to the card using Instant Dimension Foam Tape for added dimension and interest.

Step by Step Instructions to Make the Patterned Petals ‘Congrats’ Card:

- Trim and fold the white card stock to create an A2 card.
- Secure the card onto the sticky surface of the Stampwheel.
- Position the first stencil to ensure the pattern is perfectly aligned.
- Use masking paper or tape to mask off the pattern (please refer to photo and repeat for each layer)
- Use the first stencil and apply Limeade ink.
- Use the second stencil and apply Lime ink.
- Use the third stencil and apply Reindeer Moss ink with a blending brush.
- Use the final stencil to apply Brushed Pyrite Shimmer Paste.
- Leave the card to dry completely, allowing the shimmer paste to set.
- Stamp the sentiment using the Stampwheel. I used Lime and Reindeer Moss to create a gradient effect.
- Cut the sentiment out using the coordinating die. Die cut an additional layer using Brushed Silver card stock and adhere it to the sentiment to create an offset effect.
- Adhere the sentiment to the card using Instant Dimension Foam Tape for added dimension and interest.

TIP: For small, intricate patterns like stencil #4, try applying the relief paste with your index finger for better precision and control.

You may have noticed that I didn’t add any extra embellishments—the texture from the Shimmer Relief Paste doubles as a beautiful decorative element all on its own! I just love how the Shimmer Relief Paste transforms a design by adding elegance and subtle dimension!
I would love to know which design is your favorite!
Happy crafting !