Adding Texture To Washi Tape Backgrounds
by Lydia Evans November 19, 2021

Hello there, everyone! Happy Friday! Lydia here. Today, I'll be sharing a fun technique that allows you to add texture to washi tape backgrounds.

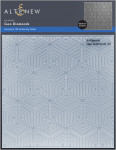
I started by taking some slim washi tape and added it to 4 1/4″ x 5 1/2″ white card panels. The red tape is from Red Sunset Slim Washi Tape Set, the green from Green Valley Slim Washi Tape Set, the pink is from Cherry Blossom Slim Washi Tape Set and the two aqua/lagoon tapes are from Sea Shore Slim Washi Tape Set. Once these were all added, I then embossed over the washi tape using Geo Diamonds 3D Embossing Folder. To help the embossing pop a little more, I took a nail file and rubbed this over the embossed image. This will take off the top layer of washi tape and leave a white embossed design.

For a little embellishment, I cut Festive Clusters Die Set and cut the images from white cardstock. I added these into place on the card panels before adding a sentiment circle on top using foam tape. The circle was cut using one of the dies from Halftone Circles Nesting Die Set and the sentiments come from Merry Reindeer Stamp Set.

To see how these card came together please watch the video below. Or over on YouTube:
Thanks so much for stopping by!
|