How to Use the Jaycee’s Swatching System for Perfect Color Palettes
by Jaycee Gaspar November 8, 2026

KEY TAKEAWAYS
Inspiration to Palette: Stop guessing your color combinations. Use your phone's camera roll or Pinterest saved pins as a real-world foundation for your cardmaking color schemes.
The Squint & Melt Test: Hold your stamped swatch card directly over your reference photo and squint. If the edge of the swatch seems to disappear into the photo, you've found your perfect color match!
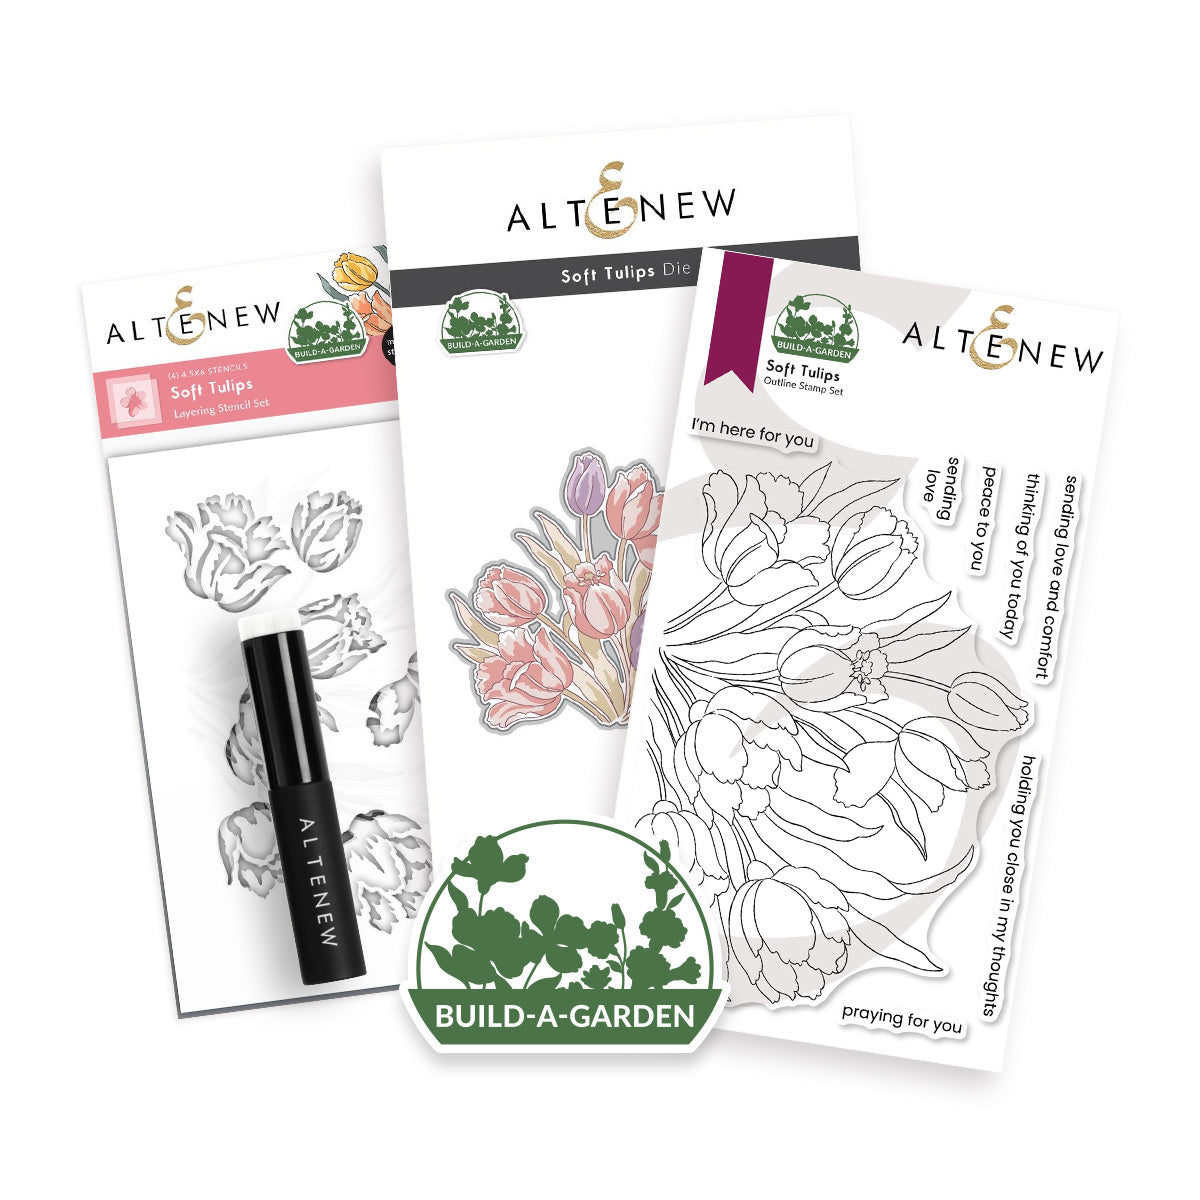
Layering Made Effortless: Standardizing your ink swatches allows you to quickly select exact light, medium, and dark shading tones for multi-step stencil sets like Build-A-Garden: Soft Tulips.
All-in-One Efficiency: Jaycee’s Swatching System acts as a functional design tool on your desk, speeding up your creative process so you spend less time choosing colors and more time crafting.
Have you ever looked at a breathtaking photo on your phone—a favorite garden bloom, a vibrant sunset, or a piece of art—and wondered, “How do I translate those exact colors onto my cardstock?”
My brand-new Jaycee’s Swatching Essentials Bundle was designed to solve that exact problem. It’s far more than just an organizational system for your craft room—it is a functional design secret that removes all the guesswork from creating naturally balanced color compositions.
Today, I’m walking you through how I use my swatching binder alongside inspiration photos to build effortless, realistic color palettes. Then, we’ll use that color formula to craft a lush floral card featuring the new Build-A-Garden: Soft Tulips set!
Part 1: Anatomy of Jaycee’s Swatching System
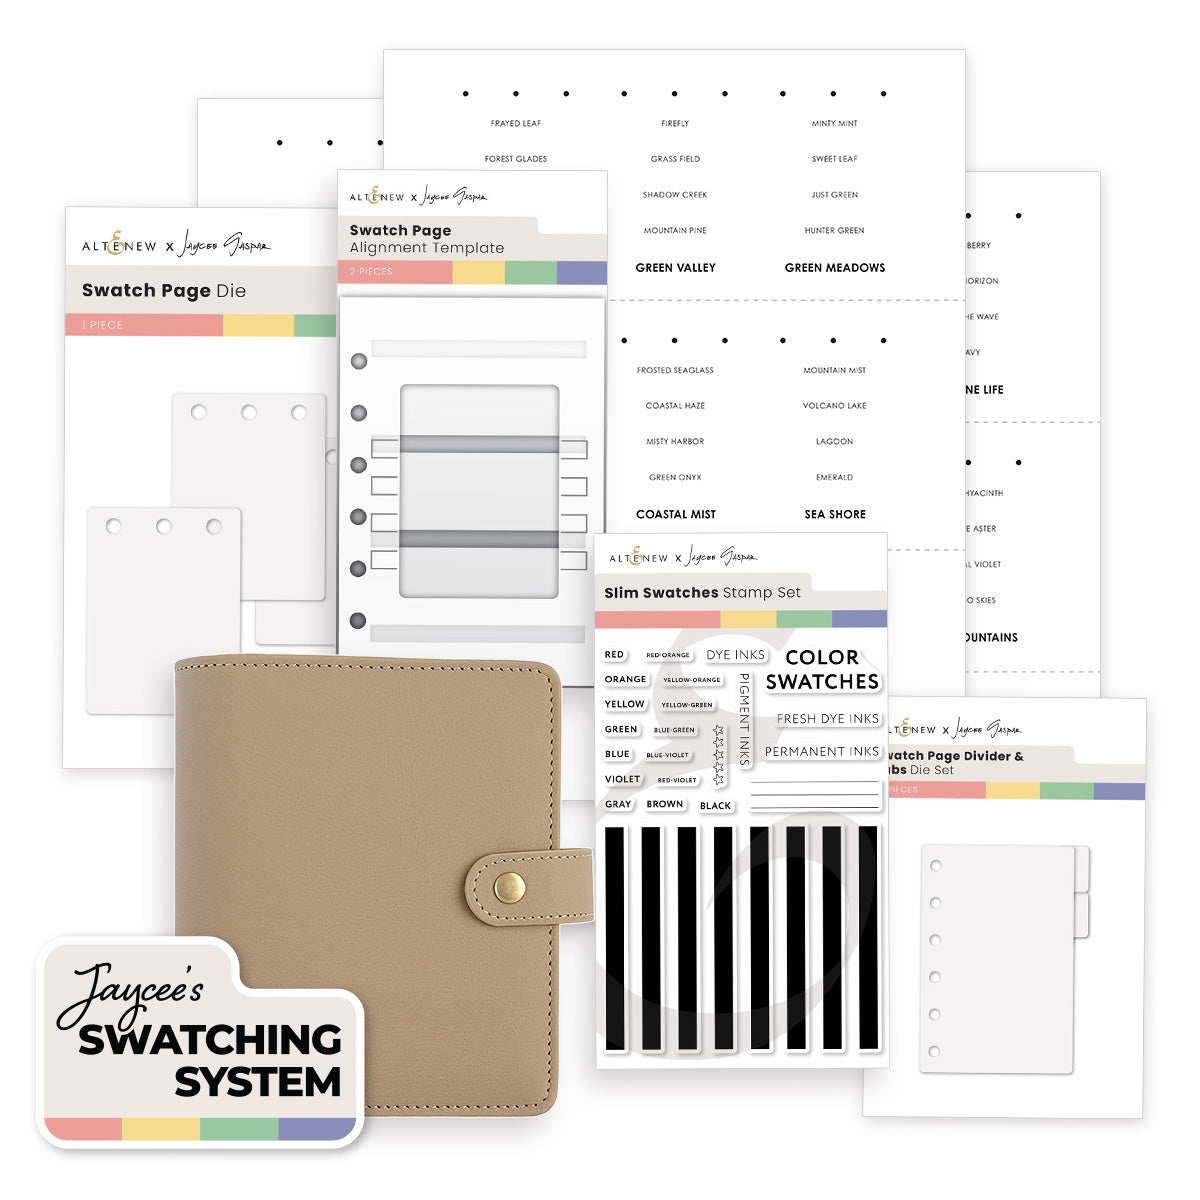
Before we jump into our card project, here is a quick tour of the components inside the Jaycee’s Swatching System Bundle and how they come together:
Slim Swatches Stamp Set (4x6): Solid color bars, tab labels, and notes lines
Swatch Page Die: Die-cuts 3 uniform swatch cards
Swatch Page Divider & Tabs Die Set: Custom color family navigation
Swatch Page Alignment Template: Stenciling parallel lines & gradient ink blending washes
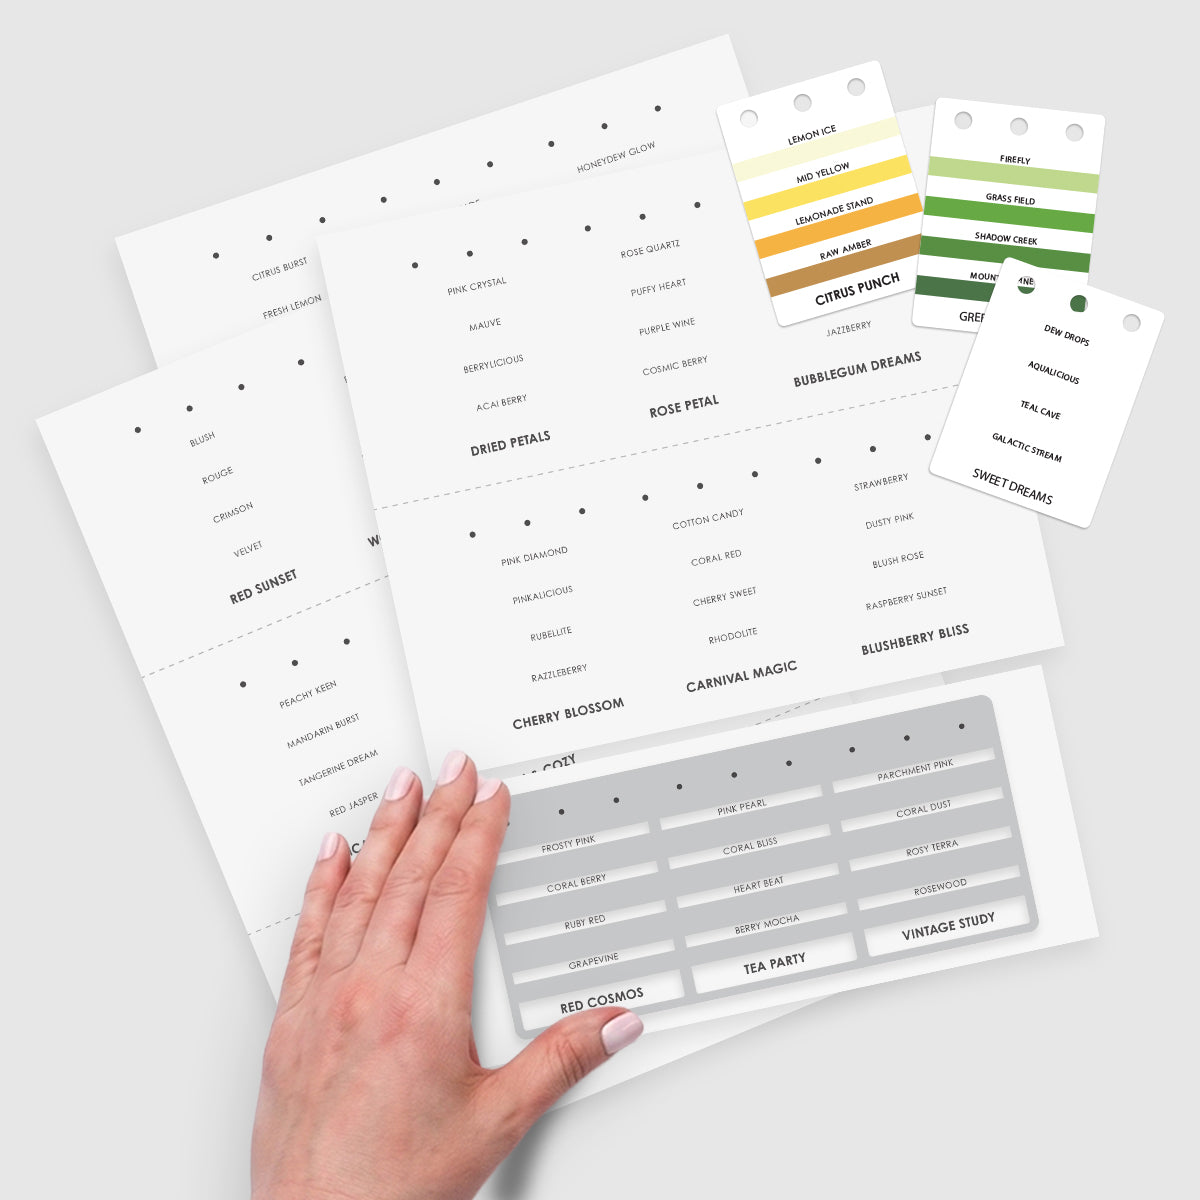
Swatch Page Printables: Pre-labeled cards for all Altenew Fresh Dye & Pigment Inks
Swatch Book Album A7 (Beige): Neutral, 1" ring binder to keep everything secure & desk-ready

Quick Assembly Tip:
When printing your Swatch Page Printables, always ensure your printer scale is set to 100% (Actual Size) and that options like "Fit to Page" or "Shrink to Printable Area" are turned off. The 9 top holes on the Swatch Page Die are engineered to align precisely with the 9 printed guide dots on the cards. (Pro-Tip: Use the needle point on your Altenew Perfect Picker to pop out the tiny hole die-cuts in seconds!)
Part 2: The Photo-Matching Technique
For today’s card, I pulled a reference photo of a candy-striped tulip from my garden. Rather than guessing which inks would look best, I used my swatching binder to sample colors directly against my camera roll.
Jaycee’s Squint & Melt Test: Hold your stamped swatch card directly against the color section on your screen. Zoom in close and squint your eyes. If the crisp edge of your swatch card seems to "melt" seamlessly into the photo, you’ve found your perfect ink match!
Here is the exact palette we matched for our Build-A-Garden: Soft Tulips:
Flower Outline & Overlap Shadows: Warm Gray Fresh Dye Ink (Evening Gray)
Candy-Striped Tulip Petals: Red Sunset Fresh Dye Ink (Velvet)
Bright Tulip Centers: Pocketful of Sunshine Fresh Dye Ink (Fresh Lemon & Honey Drizzle)
Stems & Leaves: Green Valley Fresh Dye Ink (Grass Field & Mountain Pine)

Final Touches: Balancing the Rigid with the Organic
To finish the cards, I added splatters of Jet Black and Pure White Ink Spray.
Finally, I tucked my sentiments and Crystal Moonlight Stellar Sequins along that same spiral path to lead the eye across the design.

Part 3: Step-by-Step Cardmaking Tutorial
Step 1: Rough Outline Stamping
Mount your cardstock panel on the Altenew Stampwheel 2.0 using your alignment template.
Lightly stamp the Build-A-Garden: Soft Tulips main image using Evening Gray Fresh Dye Ink.
Note: Keep this first stamping pass very light—we just need a faint guideline to position our layering stencils!
Step 2: Layering Ink with Precision
Tulip Petals (Stencil 1): Using a detail blending brush, replicate the candy-stripe pattern using Velvet Fresh Dye Ink. Add a soft halo of Fresh Lemon and Honey Drizzle near the base/center. Use an ink blending tool with Evening Gray to softly shade areas where petals overlap.
Petal Details (Stencil 2): Deepen the candy-stripe details with a second pass of Velvet ink.
Leaves & Stems (Stencil 3 & 4): Apply a light wash of Velvet to the very tips of the leaves first (this adds incredible realism!). Blend Grass Field over the main leaf body on Stencil 3, then shade the bases, stems, and flower undersides with Mountain Pine on Stencil 4.
Step 3: Crisp Final Stamping & Splatter
Place your stenciled panel back into the Stampwheel alignment template.
Stamp the Soft Tulips outline image a second time with Evening Gray Fresh Dye Ink for a perfectly crisp, solid outline.
Cut and segment the tulip bundle so the composition fills a portrait-oriented A2 panel naturally.
Step 4: Finishing Touches
Foam-mount the segmented tulip clusters and sentiment banner onto a clean white card base.
Flick Pure White Ink Spray over the tulips for fresh texture.
Dilute a drop of Jet Black Ink Spray with water to create an matching Evening Gray splatter across the background.
Accent with a scattering of Crystal Moonlight Sequins.

Let’s Chat!
Taking the guesswork out of color theory makes card designing pure joy. Now it’s your turn! Open up your phone’s camera roll, grab your swatching binder, and let your favorite photos inspire your next project.
What photo in your camera roll are you going to swatch first? Let me know in the comments below!
Until next time, happy crafting!

Get the following Swatch Printables: Medium Swatches Printable (Style B), Small Swatches Printable (Style C), and Swatch Page Printables (Jaycee's Swatching System) for FREE on every order of the following Swatching System products:
- Slim Swatches Stamp Set (Jaycee's Swatching System)
- Swatch Page Die (Jaycee's Swatching System)
- Swatch Page Alignment Template (Jaycee’s Swatching System)
- Swatch Page Divider & Tabs Die Set (Jaycee's Swatching System)
- Jaycee's Swatching Essentials Bundle
- Medium Swatch Card Die (Style B)
- Medium Swatches Stamp Set (Style B)
- Pocket Page Swatch Bundle - Style B
- Small Swatch Card Die (Style C)
- Small Swatches Stamp Set (Style C)
- Pocket Page Swatch Bundle - Style C
- November 2026 Full Release Bundle
Offer runs from November 4, 2026 at 12:01 AM EDT until November 16, 2026 at 11:59 PM EDT. Shop here: https://oltonew.shop/collections/november-2026
Supply List
|